linux
Network Bandwidth Checker
This post concentrates on development of an automated Bash Linux tool for checking Internet connection bandwidth provided by Internet Service Providers (ISPs), periodically. The tool outputs data in .csv format so that “spreadsheet” software such as Microsoft Excel or LibreOffice Calc is able to read data and construct charts. The tool was created primarily to conduct an assessment of the reliability of ISPs.
NOTE: The tool utilises directories that might not be present on your system. Directory adjustments are required in order to implement the tool onto your system.
REQUIRED SOFTWARE
speedtest-cli – provides Internet connection upload and download bandwidth data for the tool to format. To download speedtest-cli do:
wget -O speedtest-cli https://raw.github.com/sivel/speedtest-cli/master/speedtest_cli.py
HOW IT WORKS
The tool invokes speedtest-cli and stores its output into a temporary file.
(/root/programs/network-checker/speedtest-cli --secure) > /root/programs/network-checker/tmp/.tmp.txt
Then the tool utilises grep and awk to filter out necessary information, and stores those values into variables download_info and upload_info.
download_info=$(cat /root/programs/network-checker/tmp/.tmp.txt | grep 'Download' | awk '{print $2}')
upload_info=$(cat /root/programs/network-checker/tmp/.tmp.txt | grep 'Upload' | awk '{print $2}')
The tool then inputs variables download_info and upload_info as well as the current time in HH:MM format into a CSV file, in this order Time Download Upload.
These variables are inputted in a CSV file that is created utilising $(date +%d-%m-%y).csv. This means that the filename will contain date the tool was ran and the time entry in the file will contain the exact time the tool was ran.
echo $(date +%H:%M)","$download_info","$upload_info >> /root/programs/network-checker/status-files/$(date +%d-%m-%y).csv
The tool also contains an IF statement which decides whether directory that is supposed to contain CSV status files, contains one from the day the tool is ran.
If the file is not found the tool creates the file in this format "$(date +%d-%m-%y).csv" and adds a header “Time,Download,Upload” and proceeds with grabbing Download and Upload values and input them into the CSV file.
If the file is found the tool proceeds to grab Download and Upload values and input them into today’s CSV file.
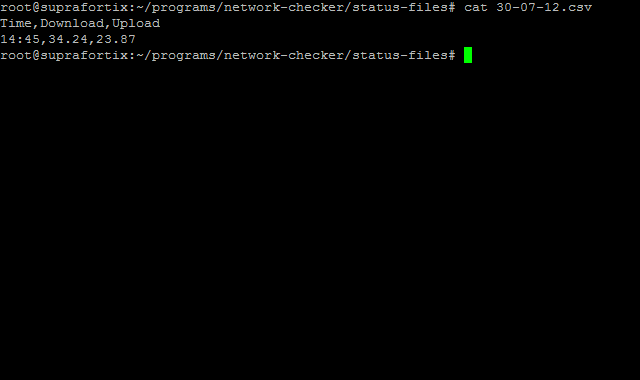
The CSV file should look something like this. This is just a test file.
THE SCRIPT
#!/bin/bash
bandwidth_checker(){
(/root/programs/network-checker/speedtest-cli --secure) > /root/programs/network-checker/tmp/.tmp.txt
download_info=$(cat /root/programs/network-checker/tmp/.tmp.txt | grep 'Download' | awk '{print $2}')
upload_info=$(cat /root/programs/network-checker/tmp/.tmp.txt | grep 'Upload' | awk '{print $2}')
echo $(date +%H:%M)","$download_info","$upload_info >> /root/programs/network-checker/status-files/$(date +%d-%m-%y).csv
}
if ls -al /root/programs/network-checker/status-files/ | grep -q $(date +%d-%m-%y); then
bandwidth_checker
else
touch "/root/programs/network-checker/status-files/$(date +%d-%m-%y).csv"
echo "Time,Download,Upload" > /root/programs/network-checker/status-files/$(date +%d-%m-%y).csv
bandwidth_checker
fi
EXTRA
For me personally, I have added the script into crontab for root user, to be ran every 30 minutes at 0 and 30 minutes of every hour.
crontab -e -u root
And added a line.
0,30 * * * * /root/programs/network-checker/network-checker.sh
The result is.
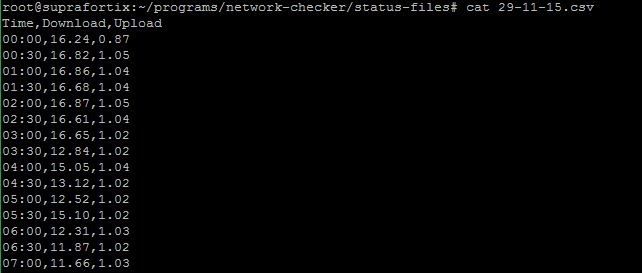
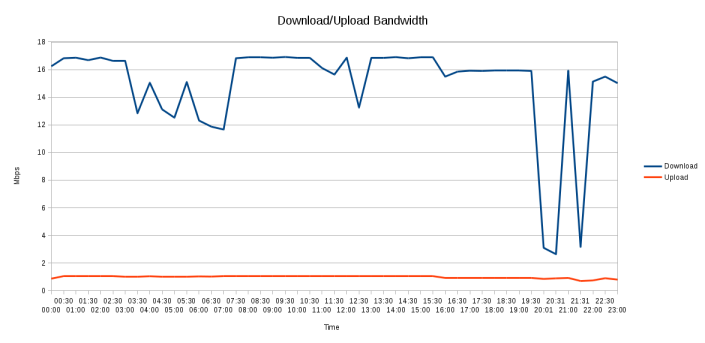
I inputted the CSV file into LibreOffice Calc and I assembled a graph of my bandwidth readings during 29th of November.
FUTURE DEVELOPMENT
The tool will automatically assemble a graph in LibreOffice Calc and output a PNG file.
Netcat LAN File Transfer
This post concentrates on the use of non-encrypted Netcat file transfer capabilities. My setup consists of Kali Linux running in VMware environment, and Windows 8.1 as the main operating system. VMware clients need to be set to bridged connection, to situate the virtual machines on the same network as your main OS. Sure you can just use VMware drag and drop box to share files, but this is much cooler!
NETCAT INSTALLATION
Note that Netcat is marked as a malware by most antiviruses. This is caused because Netcat is sometimes used as a core component for Rootkit malware. This is also caused by the nature of tools that Netcat provides, such as netcat -e -which allows a remote client to execute commands on a different client, while the output of the command is sent back to the remote client. However, there is a version available which has been stripped down from these capabilities. I have tried both of these versions in a virtual and real environments, and both do what they are supposed to do.
Download NetCat for Windows with netcat -e
Download NetCat for Windows without netcat -e
If you have downloaded the complete version of Netcat it is advisable to turn of any active antivirus software as they tend to erase or isolate nc.exe during unzipping process. Unzip the content of Netcat download into C:/Program Files/netcat/. Turn your antivirus on, scan netcat directory and set the antivirus to ignore nc.exe, to avoid future hiccups. DO NOT run nc.exe at this point, it might get erased.
WINDOWS SYSTEM ACCEPTANCE
Go to Control Panel > Widows Firewall > Allow an app through Widows Firewall > Change settings > Allow another app… > Browse, search for the netcat directory and allow nc.exe.

BASIC LAN FILE TRANSFER
Netcat Listener
First it is required to set up Netcat to listen to inbound traffic in Windows. Open command prompt as an administrator -command prompt with user privileges will not work, as illustrated below.

Open cmd.exe as an Administrator.
cd C:/Program Files/netcat/-enters Netcat directory.
nc.exe -l -p 80 > data.pdf-starts listening for inbound traffic.
-l-sets Netcat to listen mode.
-p 80-sets the port number for the local endpoint connection.
data.pdf-stores inbound, target file by this name and extension.

The Netcat Sender
We want to transfer a file from Kali located in /root/ named data.pdf.

nc -w3 10.208.42.58 80 <-type this and drag and drop the source file into the command window.
nc -w3 10.208.42.58 80 < '/root/data.pdf'-it will end up looking something like this.
10.208.42.58-is the IP address of the listener.
80-port number for the local endpoint connection. Note-pis not included, it does not work with it for unknown reasons.

Note that sometimes Netcat sender does not stop transmitting, press CTRL+C to end the file transfer process. The transferred file will be located in C:/program files/netcat/ directory.

Netcat listener and sender need to be programmed afresh for every single file separately. I’m planning to program BATCH and BASH scripts on both ends to automate the process that will allow transferring multiple files without the need of restarting Netcat.
